How to Stretch Loose Carpet
How to Stretch Loose Carpet https://www.carpetgurus.com/wp-content/uploads/how-to-stretch-carpet-1024x726.jpg 1024 726 Marvin Wallace Marvin Wallace https://secure.gravatar.com/avatar/dfba7fb04287da7d901f561fada57000?s=96&d=mm&r=g- Marvin Wallace
- no comments
I’ve never met a flooring surface I couldn’t take on, but carpet has certainly given me a run for my money over the years. From mysterious bubbles under the bedroom rug to slowly spreading lumps in the living room, it’s a floor type seemingly destined to wrinkle.
As a longtime DIYer and renovator, I used to call in the professionals at the first sign of sagging. But after shelling out thousands to stretch my unruly rugs, I decided enough was enough. Armed with determination, a few specialized tools, and more than a little elbow grease, I set out to master the art of DIY carpet stretching.
In the following guide, I’ll share the proper technique for safely stretching loose carpet in any room of your home.
We’ll assess common carpet damage, remove those stubborn old tack strips, and secure fresh padding so your floors lie flat once again. You’ll learn how to harness the power of a carpet stretcher and which handy kicker to use for hard-to-reach spots.
Before you know it, the days of tripping over rumpled floors will be a thing of the past. With my tested tips, you can gain the confidence to breathe new life into tired carpets yourself.
So put away your wallet – no need to call in the pros! Stretching your own carpet is an accessible and rewarding weekend project.
- Assessing Carpet Damage
- Gathering Stretching Tools
- Preparing the Floor Surface
- Peel Back Existing Carpet
- Take Out Old Tack Strips
- Remove Other Fasteners
- Fix Subfloor Issues
- Installing New Tack Strips
- Installing Fresh Carpet Padding
- Positioning the New Carpet
- Stretching Carpet
- Securing Carpet Edges
- Pulling It All Together
Assessing Carpet Damage
Before taking out the old carpet to stretch it, it’s important to assess the current state of your floors. Look for these problems:
Worn spots – Traffic areas may show accelerated wear, making the carpet too thin to stretch well.
Fraying – Over time, carpet fibers along edges or seams can become frayed. Stretching will worsen these spots.
Seam separation – Places where carpet strips meet may start to separate. Stretching puts added stress on seams.
Moisture damage – Leaks or spills can cause mold, mildew and degrade carpet backing. Stretching is difficult.
Indentations – Furniture legs can imprint the pile over time. Stretching won’t fix these dents.
Improper installation – Original installers may have stretched carpet insufficiently. Stretching correctly is key.
Identifying issues now prevents wasting effort trying to stretch what can’t be fixed. If damage is extensive, new carpet may be the best solution.
Gathering Stretching Tools
Stretching carpets takes specialized tools not found in basic toolkits. You’ll need to rent or buy many of them from a home improvement store. Here’s what you’ll need:
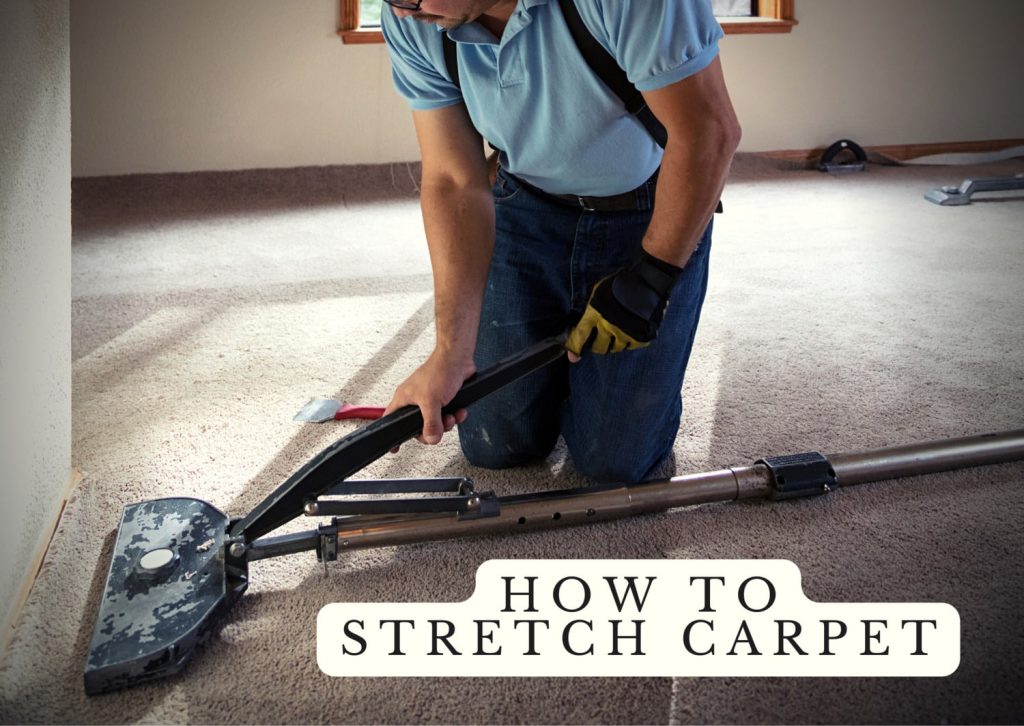
Power Stretcher

This uses a lever system with prongs that grip into the carpet backing as you lean your body weight onto it. Models with adjustable poles allow stretching of long expanses.
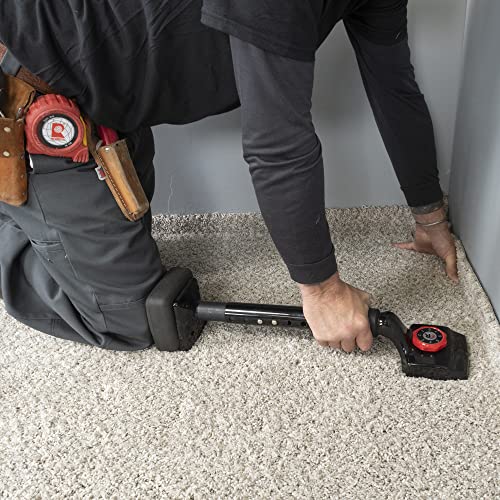
Knee Kicker

Like a power stretcher for small spaces. Place it against the baseboard, engage prongs into carpet, then use your knee to pull.
Carpet Cutter

Essential for trimming excess carpet after stretching. Provides control versus using a utility knife.
Tack Strip

Provides the grip to hold stretched carpet tight. Look for commercial grade strips with razor-sharp tacks.
Staple Gun

Needed to secure padding to the floor along walls. A heavy-duty stapler with adjustable power is best.
Hammer

Useful for tapping tack strips into place and adjusting as needed. Choose a sturdy, steel head model.
Pry Bar

Invaluable when removing old tack strips, especially those firmly adhered. Look for at least a 24-inch rigid bar.
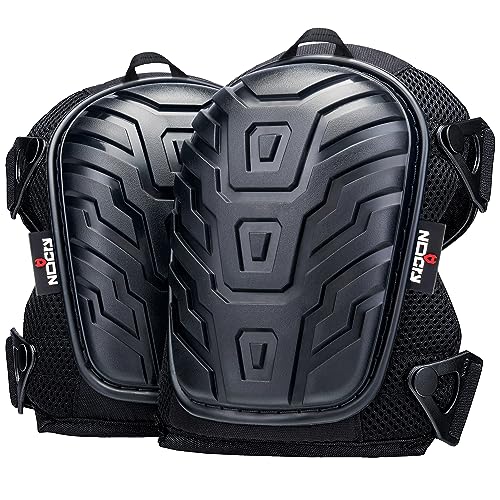
Knee Pads

Cushions your knees when using the kicker. Choose a heavy-duty gel pair for comfort.
Gloves & Goggles


Protects hands when tearing out old strips and eyes from debris. Get heavy work gloves and goggle.
Preparing the Floor Surface
With your tools gathered, you can now prep the floor for stretching out your carpet. Completely clear the room of all furniture.
Thoroughly vacuum up all loose debris. Rent a carpet cleaner to deep shampoo the remaining carpet and let it fully dry.
Peel Back Existing Carpet
Time to start ripping up this wrinkled rug. Your carpet is held captive by those sneaky tack strips running along the edges of the room.
Start your carpet liberation mission in one corner, slowly easing the material away from its spiky foes. Push and pull gently at first – you don’t want to accidentally shred your carpeting in the escape attempt.
If the carpet won’t budge, break out the pliers to get a better grip on its corner and try again with a bit more force. But not too much…this is a delicate operation!
Once you finally coax it up, the carpet should release from the tacks smoothly like a zipper opening up. Just be careful not to pull too aggressively and overdo it, or you could end up with torn fibers or backing.
And leave your carpet anchored on at least two opposing walls – ripping it up completely makes it harder to work with.
Call in a professional if things get too tricky. With a little luck and finesse though, you’ll soon have that carpet freed from its gripping confines.
Take Out Old Tack Strips
Tack strips around the perimeter provide the grip to keep carpet taut. To install fresh strips, the old ones need to go. Start by feeling around the edges to locate them under the carpet.
Once found, slide a flat pry bar under the protruding strip ends. Gently lift upwards, pulling the strips out as you go. Take care not to tear up the carpet itself. Discard the old tacks immediately before you step on one!
Remove Other Fasteners

Check the underside padding for staples used to hold it down. Pull these out using pliers for a good grip. Check for any other stray tacks along the walls as well and remove them. This leaves a clean foundation for new fasteners.
Fix Subfloor Issues
With the old strips gone, you can inspect the bare floor underneath. Look for loose boards, cracks, and inconsistencies. Use an appropriate wood filler for dents and a rubber mallet to hammer down protruding nails or boards. It’s a good idea to vacuum and remove any dust or debris from the floor now.
The floor needs to be perfectly flush so the fresh padding and carpet have an even surface to adhere tightly to. Address any imperfections now before moving onto the next steps.
Installing New Tack Strips
Tack strips provide the grip that keeps freshly stretched carpet tight and smooth. Follow these pro tips:
Measure perimeter – Calculate the room’s linear dimensions to determine how much tack strip you’ll need. Buy 10% extra.
Cut strips – Using tin snips, cut tack strips to fit each wall, allowing for doorways and corners.
Space 1/4″ from wall – Place strips 1/4″ from the walls so carpet has space to tuck in.
Sink nails – Use a hammer to tap down the nails that adhere strips to the floor.
Bend at corners – To go around corners, heat strips with a hair dryer to soften and bend easily.
Double up – For extra hold, use two strips parallel on longer walls.
Properly installed tack strips keep carpet taut, preventing later restretching.
Installing Fresh Carpet Padding
Before restretching the carpet, it’s crucial to replace the worn-out padding underneath, if necessary. Follow these steps:
Inspect padding – Look for mold, mildew, tears or moisture damage. Make sure it’s still springy and not compressed.
Cut padding – Use a sharp utility knife to cut pad pieces to fit room dimensions. Leave extra length along walls for trimming.
Place padding – Lay the padding evenly over the floor surface. Butt seams tightly but don’t overlap.
Secure padding – Use a heavy-duty staple gun to adhere the padding to the floor, placing staples every 2-3 inches along the edges.
Trim padding – Use shears to trim excess padding sticking above tack strip lines or baseboards.
Replacing deteriorated padding improves carpet quality and extends its lifespan.
Positioning the New Carpet
Once padding is secured and tack strips are in place around the perimeter, you’re ready for the new carpet. If you are installing new carpet, follow these tips. Otherwise, for reusing your current carpet, lay back down the carpet and skip to the next step.
Unroll carpet – Lay the carpet along its longest dimension first. Unroll it evenly to minimize wrinkles.
Cut to fit – Measure carpet and use a carpet cutter or sharp shears to trim excess material.
Align carpet – Line up the carpet so it’s centered and square within the room before stretching.
Check nap direction – Ensure the carpet nap is facing the correct direction, usually running toward the room entry.
Spot seam areas – Mark any seam locations where carpet strips meet using painters tape.
Taking care with alignment and seams prevents issues down the road.
Stretching Carpet

Now comes the fun part – using leveraged tools to stretch and smooth the new carpet.
Start in center – Attach the power stretcher to the center of a longer wall. Keep prongs 1-2″ from carpet edge.
Stretch outward – Activate the power stretcher lever in smooth motions to stretch the carpet toward the corners.
Move to corners – Once the center is taut, reposition the stretcher to focus on tightening corners.
Switch directions – Stretch the carpet in the opposite direction, again starting at the center.
Use kicker on edges – Place knee kicker 1-2″ from baseboards to give a final tight tug.
Cut away excess – With the carpet stretched fully, use shears to trim any material sticking above the tack strips.
Tuck into strips – Lastly, tuck stretched carpet into tack strip grippers so they adhere firmly.
It takes arm strength and patience, but properly stretched carpet creates a smooth surface.
Securing Carpet Edges

For finishing touches to lock in your carpet stretching handiwork:
Seal seams – Heat bond the seam edges using a special seaming iron to meld the backing together.
Bind seams (optional) – For added seam strength, apply tape along the joined carpet edges.
Reattach trim – Use a finish nailer to reinstall baseboard trim pieces removed earlier.
Add transition strips – Install metal or wood strips where carpet meets other flooring types to secure the edges.
Replace furniture – Put the room back together by moving furniture into place. Avoid dragging pieces over carpet.
Taking time with these final steps keeps your carpet tight, flat and wrinkle-free for years to come.
Pulling It All Together
Having wrinkled, sagging carpet that trips you up is more than just an eyesore – it can cause injuries and damage your floors. Thankfully, you can get your carpet tight and taut again with some strategic stretching.
While stretching carpet requires patience and physical effort, the savings and satisfaction from doing it yourself make the work worthwhile.
Follow the process closely, employ the right tools, and set aside ample time for best results. With my detailed carpet stretching tips, you can tackle this project confidently.
Just take your time, follow safe practices, and don’t be afraid to put some muscle into it. Let me know if you need any other flooring or DIY advice!
FAQs
What’s the easiest way to get old carpet off the tack strips?
Start in a corner and gently lift the carpet away from the wall while pulling outward. This releases it from the strip’s gripping nails. Use pliers if you need extra grip.
How much force should be used to stretch carpet?
Stretch until the carpet is smooth, flat, and embedded into the tack strips. It should be taut but not so tight that the power stretcher lever is extremely hard to push down.
Is it OK to hit tack strips with a regular hammer?
It’s best to use a pry bar so you don’t damage the floor surface. Position it under the strip’s edge and gently lift up to remove.
What kind of padding works best under carpet?
Look for medium density padding made of hair, jute, foam, or rebond padding. Consult with sales staff on the best type for your home’s needs.
Should carpet be stretched along or against the grain?
Always stretch in the direction of the carpet nap, usually from the center of the room towards the walls. Stretching against the nap can damage the carpet fibers.
If you buy something on this page, we may get a small share of sale at no additional cost to you. We only recommend products that we have used ourselves and feel are really useful, not because of the limited compensation from the links through our posts.
- Posted In:
- Carpet Cleaning Guide
- Must Read Stories
Marvin Wallace
Marvin Wallace is widely published and recognized as an expert in emerging technologies as well as a frequent speaker at industry conferences. You can visit him at www.CarpetGurus.com
All stories by: Marvin Wallace


Leave a Reply